DIY Kid’s Car Activity Kit
If you look in the backseat of my car, you will see markers… everywhere. Green crayola markers on the floor. Brown crayola markers in the cup holder with the cap off. A red Crayola marker under the seat gradually bleeding it’s way into the carpet.
My daughter is an artist. She is five and has already determined her direction in life – creating art… lots of it! Anywhere and at any time.
She loves making crafts, experimenting and creating. When we got our first Kiwi Crate, she immediately dove in. Building carnival games and testing methods of ball trajectory. Kiwi Crate also had the added bonus of having the materials for every projected contained in one small kit.
If you haven’t tried Kiwi Crate before, you definitely need to check it out.
As moms. anything we find that is portable, easy and educational, we latch onto to! Yes?
But we also need ways to contain the chaos for all the supplies our kids need to follow their dreams.
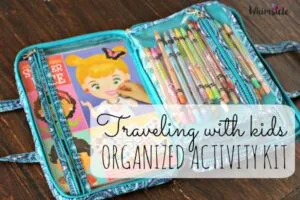
Thus, I made a kid’s travel art kit that fits in my purse and won’t leave markers all over my car. Here’s how I did it.
Kid’s Travel Art Kit Instructions
First, you will need:
- an empty DVD case
- Exact-o knife
- Self-healing cutting sheet
- Fabric (2 feet worked perfectly)
- Fabric glue (I used Liquid Stitch)
- Cardboard scraps
- 12 Colored Pencils
- Paper
First, I took an empty DVD case and cut out the circular part that holds the DVD. 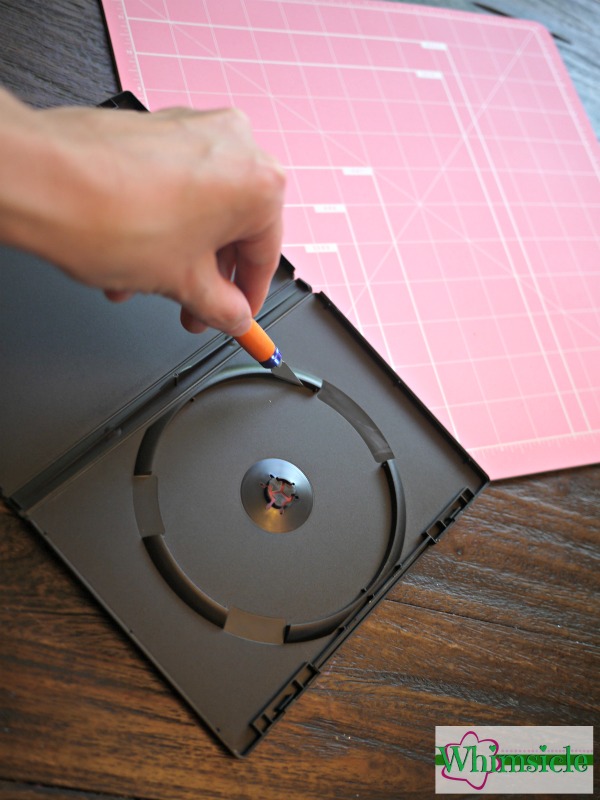 This was the hardest part of the entire project. I placed the cutting pad in between the black plastic shell and the front plastic sheath. If I didn’t, my Exact-o knife would have cut a hole in the cover of the case. Not very pretty. I ran my Exact-o knife back and forth, around the circle, gently sawing my way through, until finally…
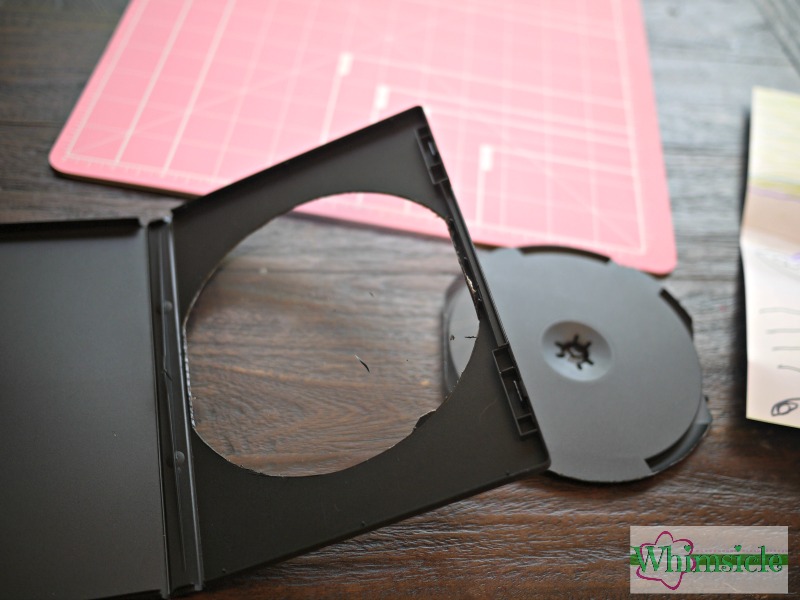 Victory!! Next, I cut my cardboard to fit in that half of the DVD case. Make sure to leave at least a quarter-inch between the edge of the cardboard and the case. If you fail to (which I did, my first try), your art case will not snap shut.
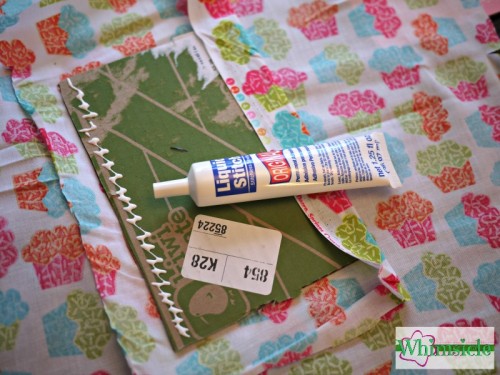
 Then, I cut a piece a fabric about an inch larger on each side than the cardboard. I glued this fabric to the cardboard with Liquid Stitch (found at Michaels).
 I then cut another piece of fabric about the same size as the first.
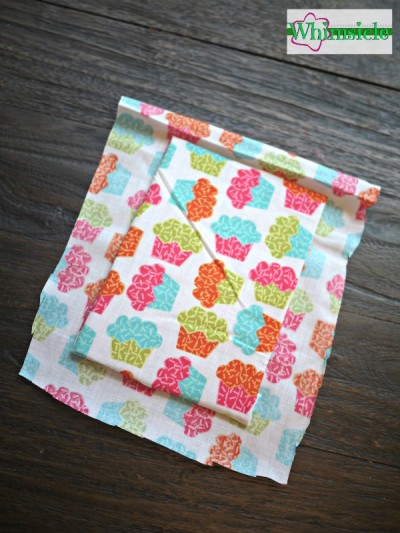 I folded this piece in half and arranged it as the colored pencil pouch.
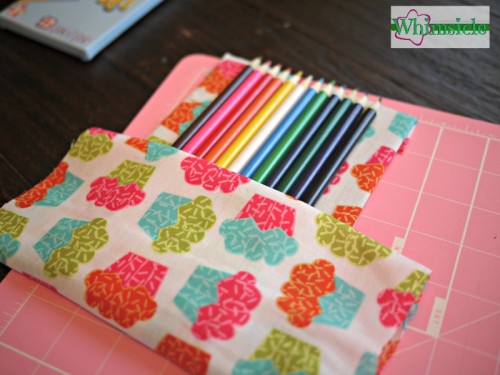 Make sure to place your colored pencils inside before gluing down this fabric to the back of your cardboard. I flipped all of this over and glued some more!
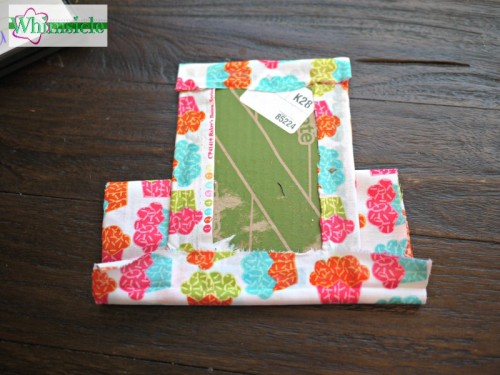 Once secure, I glued the entire contraption into the DVD case. I also cut some paper to fit under the little black, plastic clip.
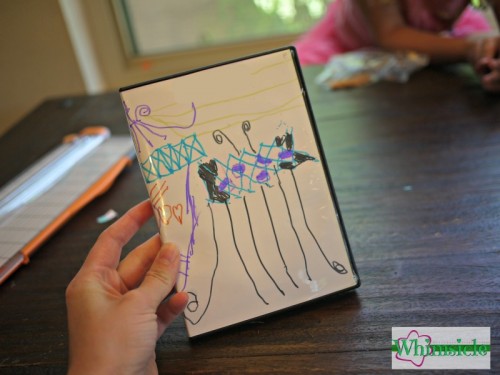
 My daughter then decorated the backside of the original DVD title sheet and I slipped that into the plastic sheet on the front of the case.
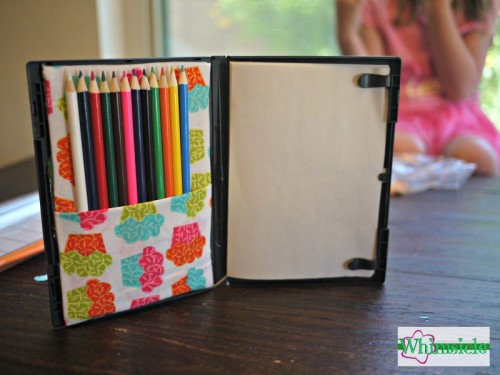
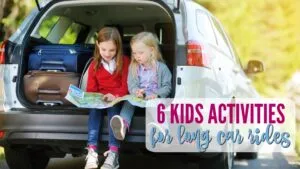
 We left on a 3-hour road trip that afternoon, so Llama used her new art kit in the car.
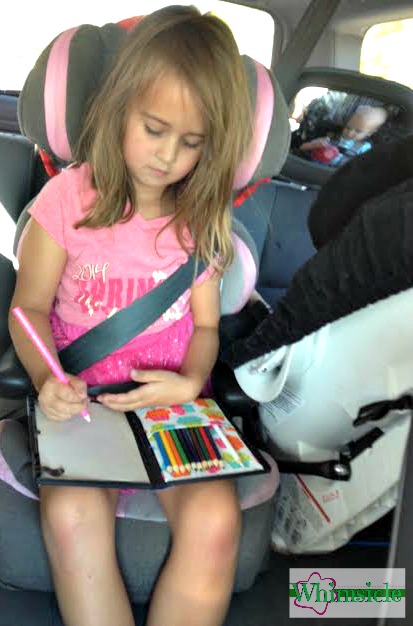 It was awesome and amazing! Best of all, no more homeless markers littering my car.
If you loved this and want more fun, easy activities for your kids, definitely look into Kiwi Crate. All of the activities are STEAM (Science, Technology, Engineering, Art and Math) aligned so that our kids are learning while they’re playing!
If you are traveling soon, you may also want to pack:
For more great DIY kids activities, try our DIY Light Sabers or how to make a lava lamp.
Recommended Posts


JoAnn Crohn
CEO/Founder at No Guilt Mom
- Signs of Mom Burnout: 3 Hidden Warning Signs and How to Recover
- Handling Sibling Fights – A Game-Changing Strategy for Parents
- Supporting Kids in Teacher Conflicts: What Parents Need to Know
- One Life Changing Tip to Stop Yelling as a Mom
- How to get family to help around the house (when they’ve been doing nothing)
- The 3-Step Plan to Change your Kid’s Spoiled Behavior
- One Magic Phrase to Tell Your Kid When She is Scared
- How to Save Tons of Time Shopping for Tween Outfits
- Getting Over Daycare Guilt: 4 Ways Your Child Will Thrive
- Talk Like a Pirate Treasure Hunt
- 13 Affordable Phoenix Fall Family Activities
- 7 Tips to Calm Toddler Tantrums in Public


This is seriously an ingenious idea!
Thanks! It was pretty easy to do – except for cutting the circle out of the DVD case. I seriously had to remind myself that I have a Masters and that I am smarter than the DVD case.
This is the coolest idea! Easy to make and I can tell my kids will both love one. I have some really cute fabric I can use too! Stopping by from #Sitssharefest – I hope you have a great weekend! Excited to be your newest follower 🙂
Thanks Heather! Love those Ice Cream Cone Cupcake as well 🙂
This is so great! I love how portable it is. Thank you for sharing!
My daughter packs this art kit with her wherever we go 🙂 Thanks for stopping by!
I think this is what I look forward to when I have kids…. DIY fun stuff making 🙂 This is a fab idea and I just love the little paper notepad in the art kit. 🙂
Thanks!! The little paper notepad is just paper I cut myself. Super easy stuff!
Brilliant idea. I featured your post with link on my blog today. Best of luck to you!
Debra Kristi ~ Live in reality. Play on the other side.
Thanks Debra!
to make cutting through the plastic easier try heating your knife in a flame it then glides through, you have to reheat several times and it makes a mess of your blade but these are easily replaced. I have a blade just for heating and cutting plastic.
That is a great tip!! Thank you! That plastic was impossible to cut through!