DIY Family Sign
I don’t know why, but I fell in love with the saying “Remember, as far as anyone knows we’re a nice, normal family.” Maybe because it’s because it describes my family perfectly….or imperfectly. As I could not afford to have someone on Etsy make my creation, I decided with the help of a friend I would tackle this project. Here is how to make your sign…
Supplies:
Wood Board (any size to fit your project)
Paint for base color (I bought mine at Target)
Paint for Lettering
Stencils
Sponge Brushes
Small Touch Up Brushes
Sand Paper
Hanging Hardware
Burlap (if you choose to add a bow)
 Start by laying our your project on your board. I used two different sized stencils so this was imperative for me. I still didn’t get it perfect, hence why the burlap bow came into play. But, that’s the beauty. Even if you mess up, there is always a solution.
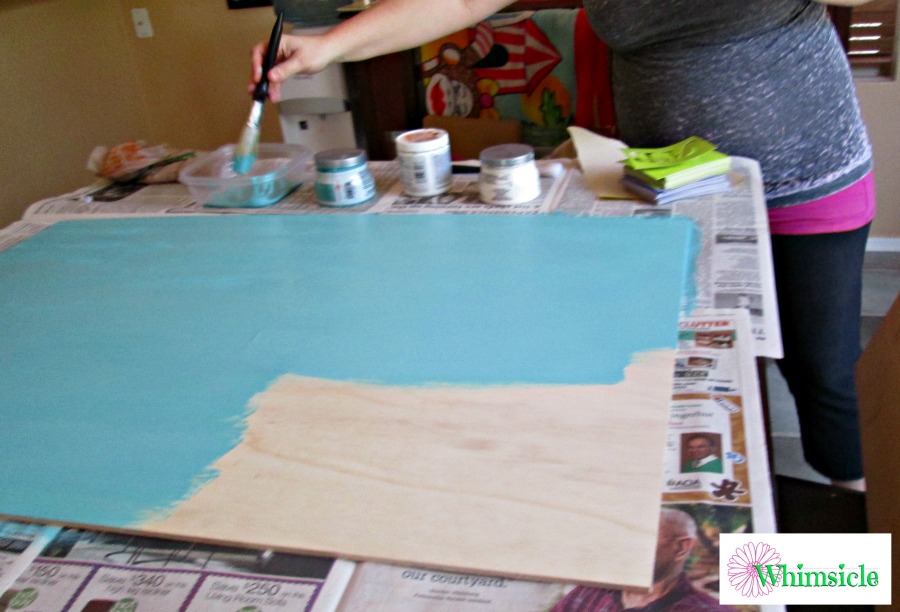 Next, paint your entire board. I did two coats since I could see the wood through the first and that wasn’t the look I was going for. Luckily, in the Arizona summer heat dried in less than two minutes.
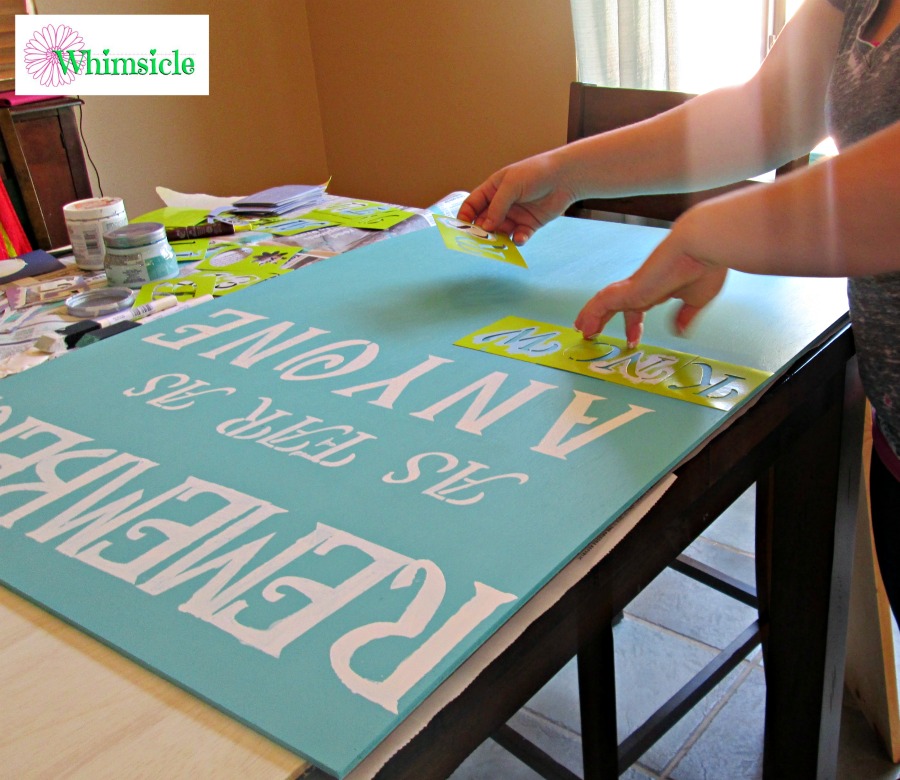 Lay out your letters and go for it! I did a row at a time, adjusting lettering as I went. Don’t worry about imperfections, you can always go back and touch up. (This will take the bulk of your time…it took me about two hours to do this entire board).
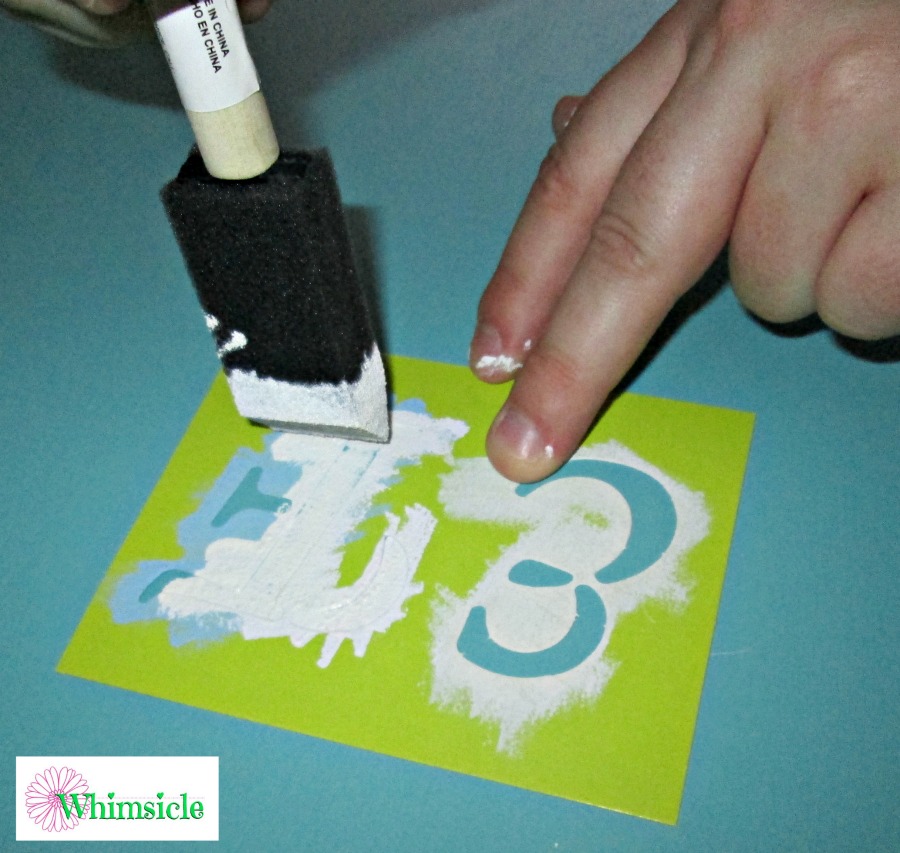 When painting the letters, be sure to use minimal paint on your sponge brush and dab it lightly as you go. Overuse of paint will lead to bleeding letters.
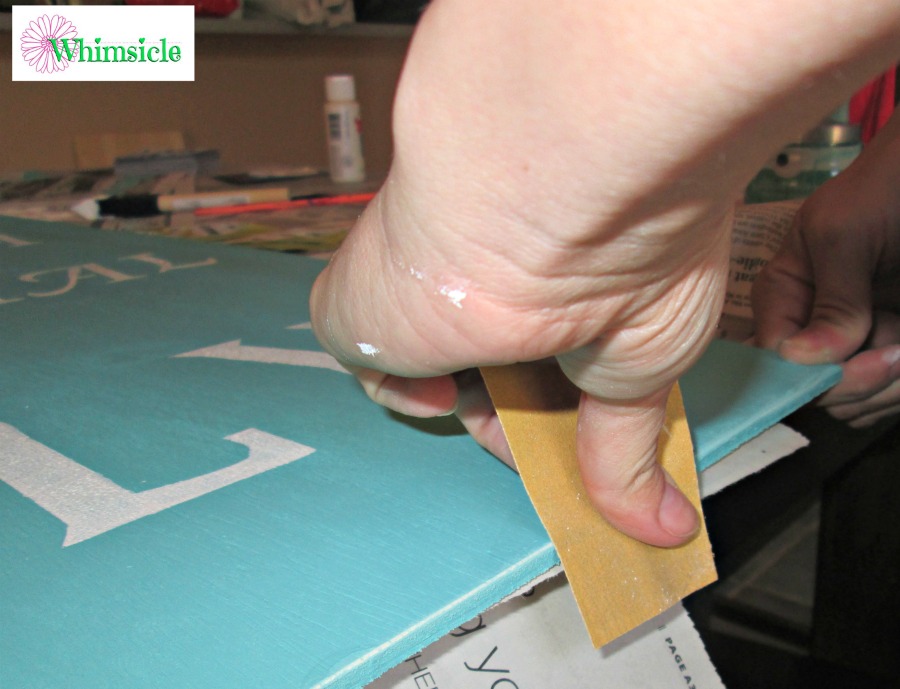 When you are all done with your lettering, take a piece of sand paper and roughen up the edges of your piece of art. It makes it look shabby chic and like it’s supposed to be flawed.
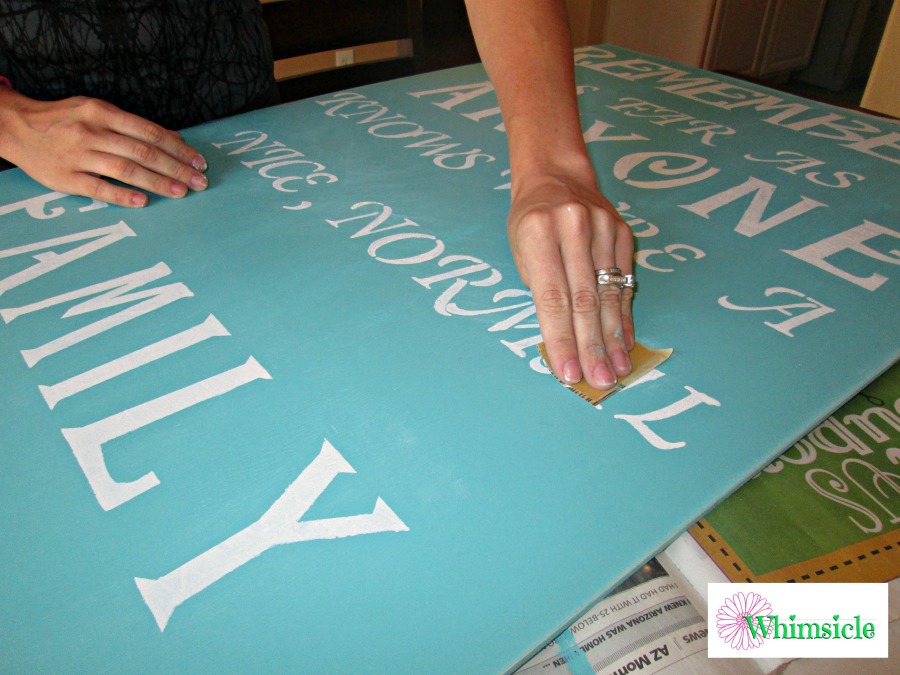 Also be sure to use a fine sand paper to lightly brush over your painted letters. They may have a slight rise to them from the excess paint but the sand paper will take that right away and blend it nicely.
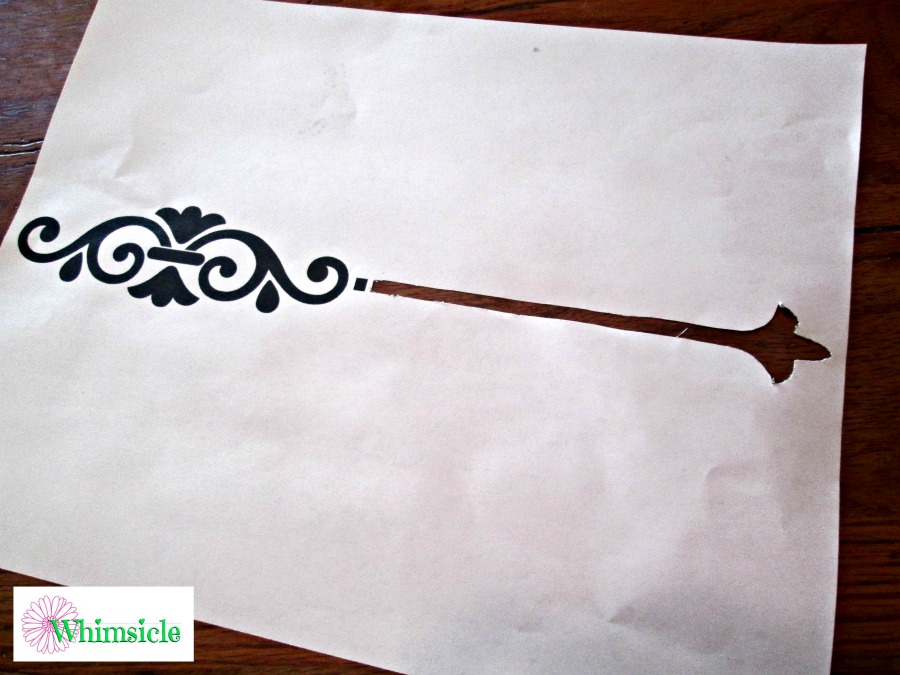 When I was done with my board, I noticed that my spacing didn’t turn out perfect. I decided to print this design and add it between lines to fill in the gap. I used an exacto knife to cut the design out, and used the sponge brush and paint just as before to add the designed stencil I made.
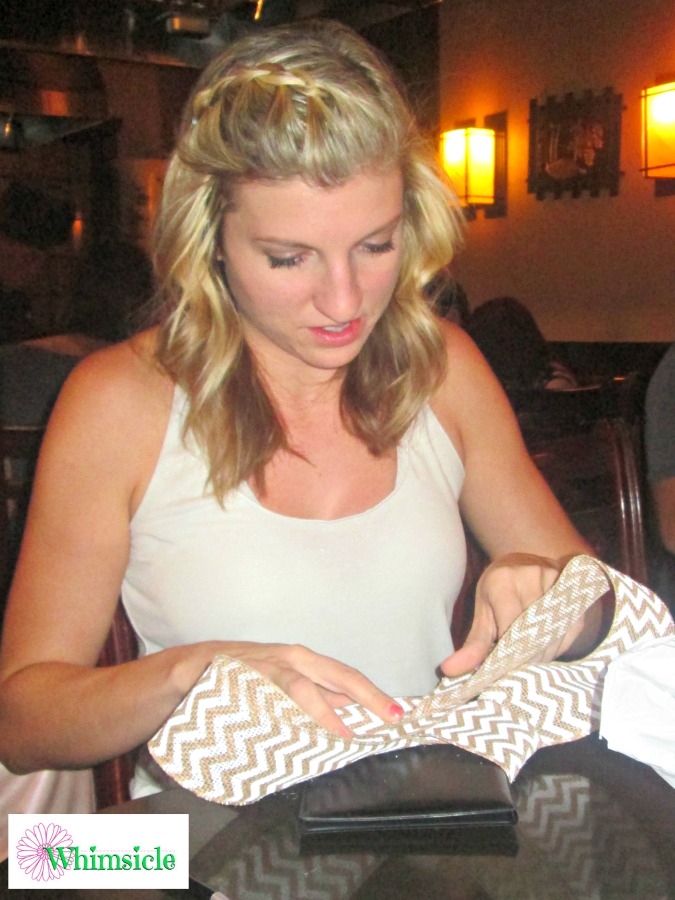 Lastly, I noticed that my first word “Remember” wasn’t perfectly centered so I enlisted my friend to help me make a bow. I can’t tie a pretty bow so my beautiful friend Sherry did it for me. However, if you don’t have a friend Sherry, you can use this Martha Stewart “Bow How-Tos” Guide.
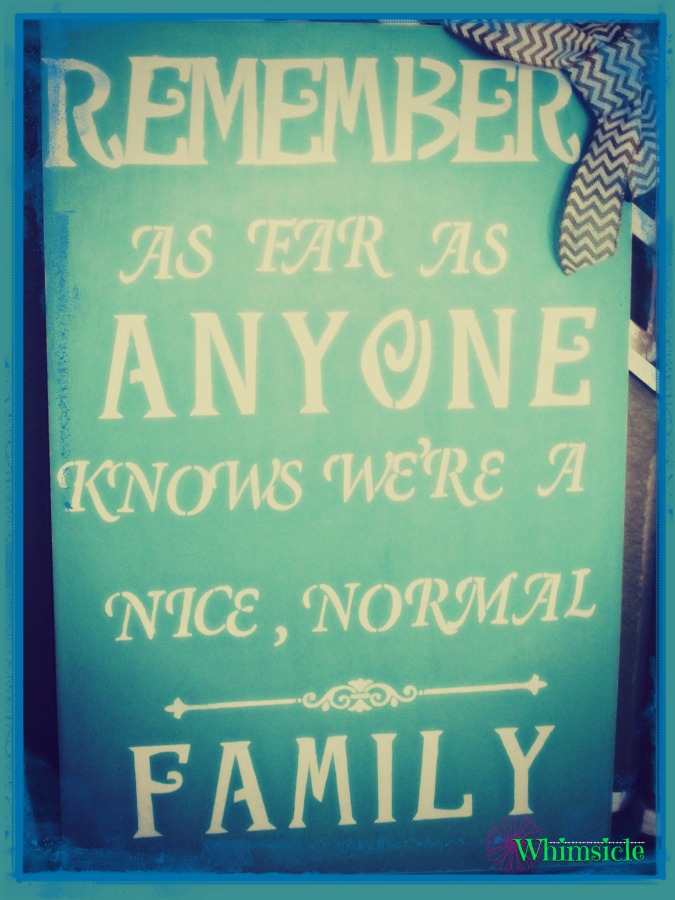 And, Voila! My sign is complete. Took a lot longer and more supplies than I anticipated, but I have the supplies now for my next project and the satisfaction of knowing I did it myself. Now, if only I could get my husband to actually hang it!
Shared with Faith Along The Way, SITS Sharefest
Recommended Posts


What a fun sign! That saying pretty much sums up my family too 🙂
What a great DIY project! I love the idea of a family sign. Cute color, too!