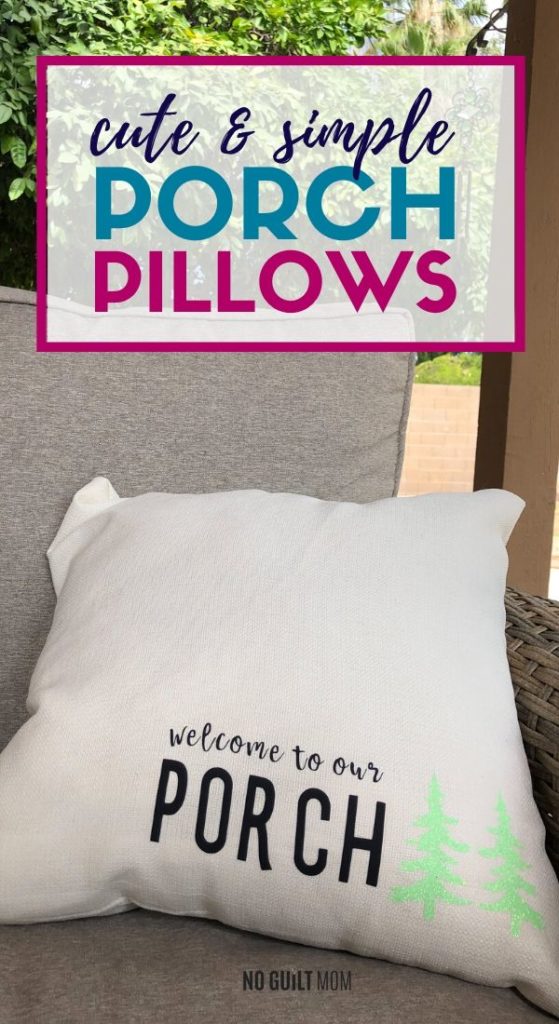
Easy DIY Outdoor Pillows for a Cute Porch
This is a sponsored post written by me on behalf of Cricut. All opinions are 100% mine.
These simple DIY outdoor pillows take less than an hour to make. Let’s do crafting therapy and give your porch some personality!
My favorite place in our house is our back porch.
Granted, I live in Arizona so it’s hot… mindblowingly hot in the summer.
But I don’t care. I soak up the heat.
Just to sit on our back couch and be outside – breathing fresh air.
Wondering when I get to go sit in my favorite coffee shop again.
It’s the most relaxing thing in the world.
Even better if I’m sipping wine out of this glass.
We bought our couch in October and haven’t done any personalizing … until now.
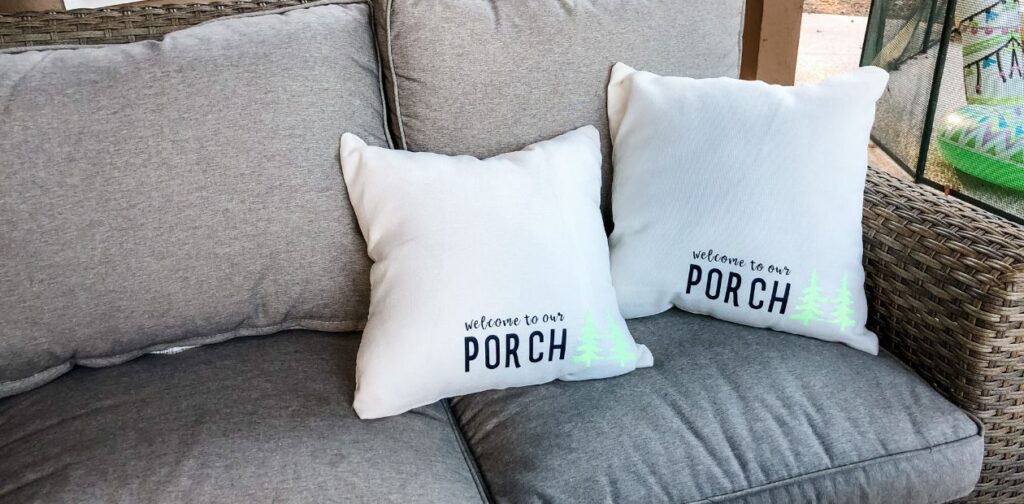
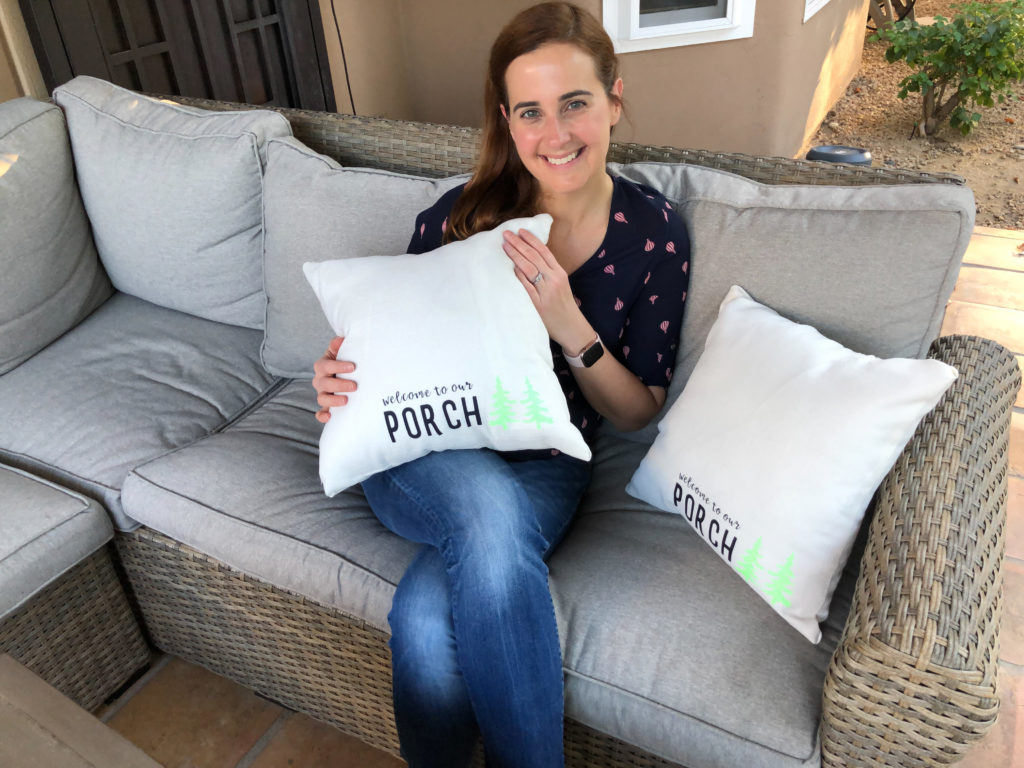
I made these easy DIY outdoor pillows for the sides of our couch.
All I actually see from my back porch couch are giant ficus trees. The pine trees remind me of my time as a camp counselor where I spent my entire summer in the pine tree forests of Mt. Lemmon, AZ near Tucson.
The Bighorn fire ripped through the area at the beginning of June. All is ok now, but the danger to my mountain made me miss these pines.
Want to make this pillow?
Let’s get started.
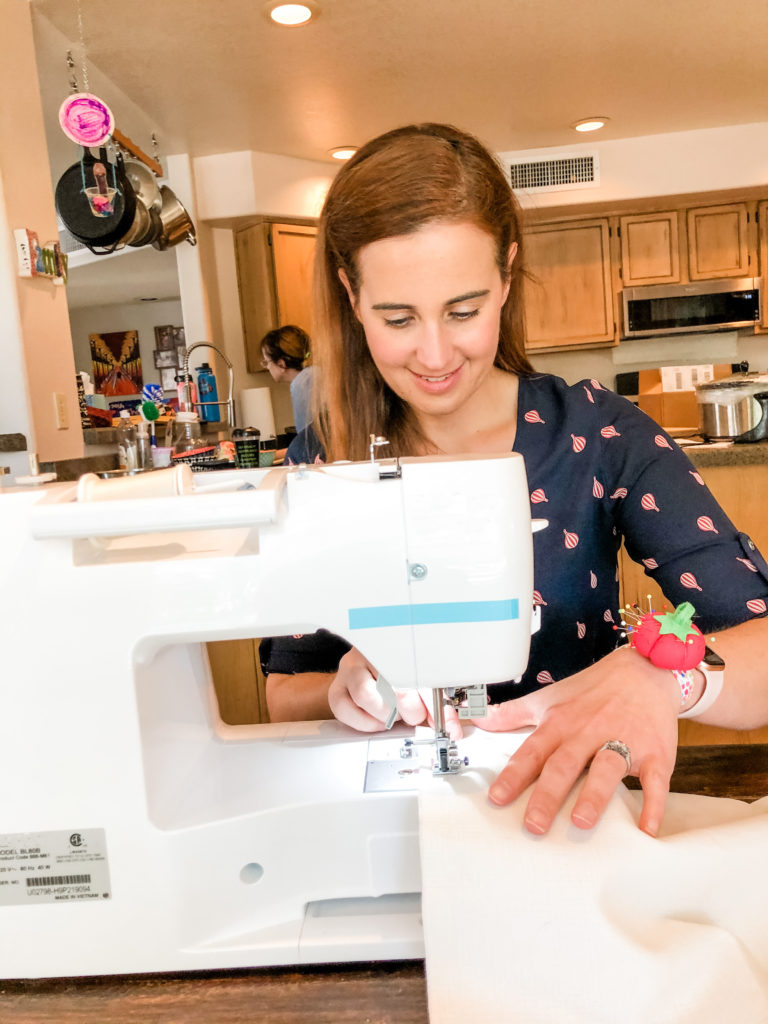
I need to confess that I sewed and stuffed my own pillows for this project.
I know.. Who am I?! Really???
If you want a slightly less time-consuming project, you can buy a pillow with a removable pillowcase. It’ll be just as impressive!
Here’s what you need for this porch with personality DIY:
Materials for DIY Outdoor Pillows:
1 yard of outdoor fabric (or removable outdoor pillow case)
2 18 X 18 pillow inserts (or premade pillow)
White thread (if sewing a pillow)
Cricut Joy Smart Iron-On in Navy
Cricut Joy Smart Iron-On Glitter in Fluorescent Green
Equipment needed:
Sewing Machine
Cricut EasyPress Mat (or use a towel)
First, let’s make the pillow,
Again, not hard and super impressive to say you made your own pillows.
“Oh yes. Those pillows. Why, I sewed them by hand.”
Of course, I don’t say it. But, you better believe I THINK it and feel this swell of pride.
Step 1: Make the Pillows
First cut out two 18” by 18” squares of fabric and place them right side together. Sew around the edges leaving a ½” seam allowance.
On one side, leave about a 5-inch gap un-sewn.
At first, I left only a 2” gap open and I had to tear apart some of my stitches just to get the pillow form through that tiny hole.
Go with me here. Leave 5”.
Turn your pillow case inside out.
Bam.. pillow done. We’ll stuff it and close it up after we put on the design.
Step 2: Cutting the design
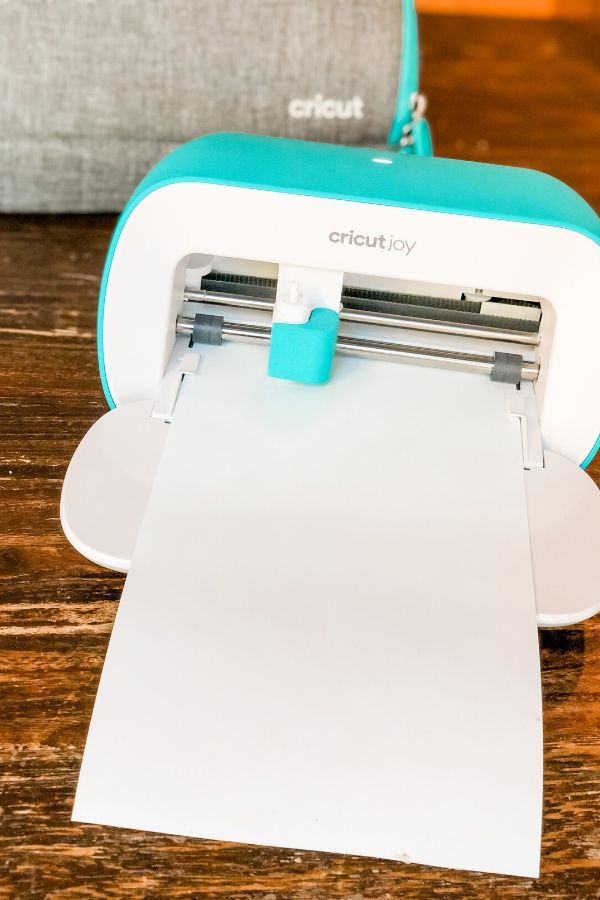
I store my Cricut Joy in an upstairs cabinet and then bring it down to our kitchen table to work. It’s so easy to pack away and set up.
Plus, I can print and press projects in less than 15 minutes, it’s that fast.
Plug in your Cricut Joy, open up Cricut Design Space on your digital device and connect it via bluetooth.
Here is the design I created if you would like to use it, too.
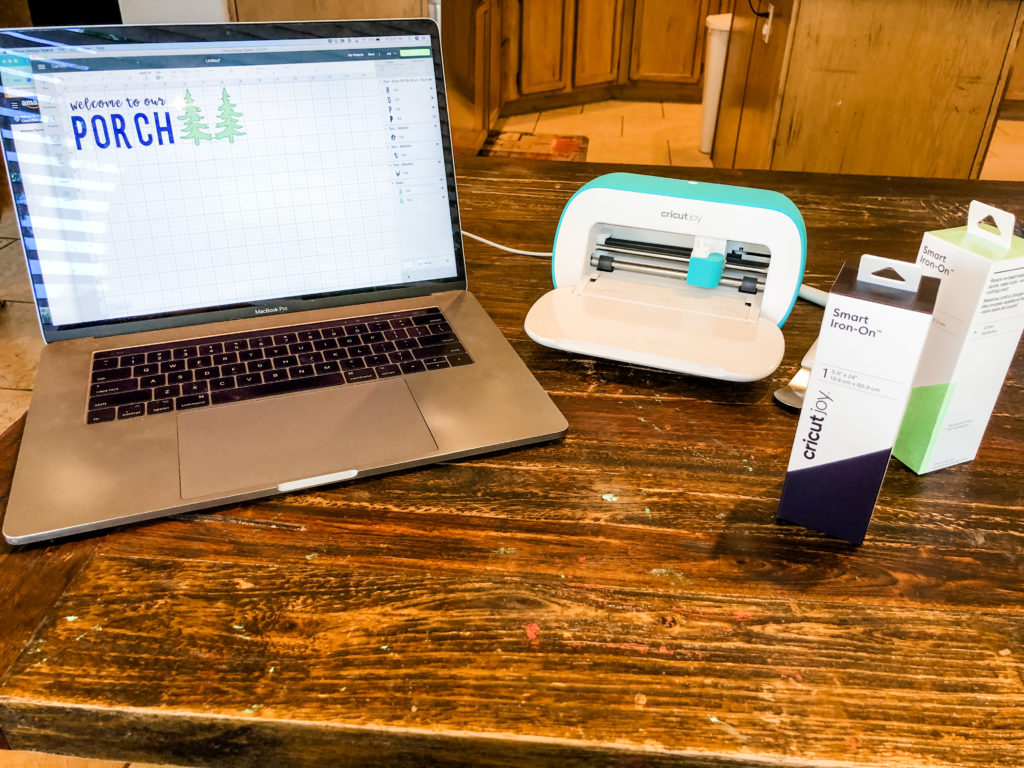
Hit “Make It” and the Cricut Design Space app will prompt you through everything you need to do from loading the machine with your Iron on.
I love the Cricut Joy smart materials because you don’t need a cutting mat or anything extra. Just put the smart material into the machine and go.
Remember to put mirror- on since you’ll be making this an iron-on.
Insert the Cricut Joy Smart Iron-on into the machine with the shiny side down. Cricut Design Space will cut each color separately and prompt you when to feed the particular color.
Step 3: Weeding the design
This is always the trickiest for me. Be patient with it and go slow.
I use a little hook from the Cricut starter tool pack to weed.
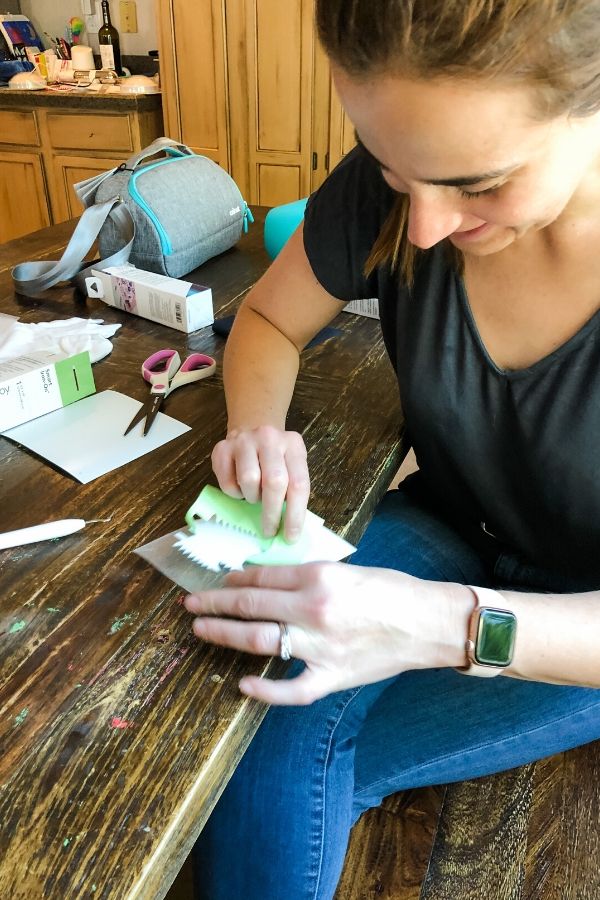
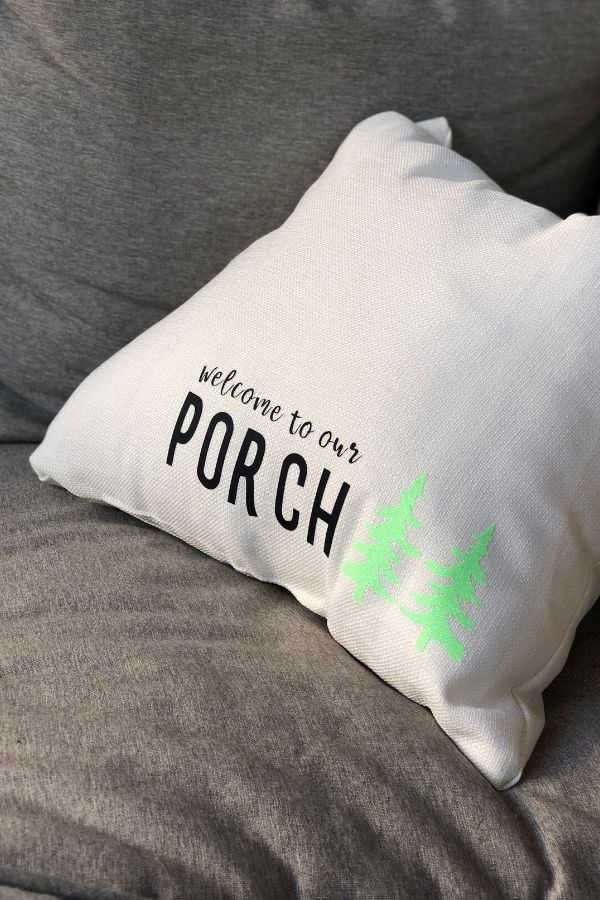
Once it’s weeded, place your design on your pillow where you’d like it. I chose the bottom corner.
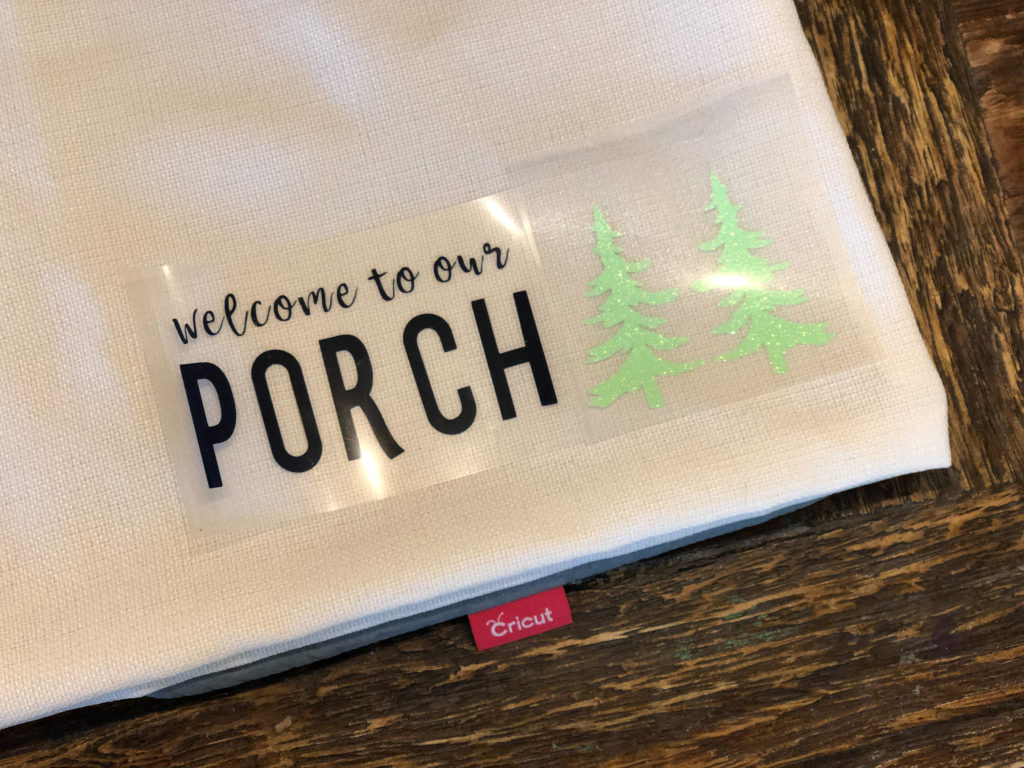
I placed it on top of the Cricut EasyPress mat and heated the Cricut EasyPress 2 up to the correct temperature.
Cricut makes it so easy. You don’t have to guess the correct temperature nor how long to hold the EasyPress 2 on the design.
Go to the heat guide here, input your materials and you’ll find the perfect temperature and method to affix your design.
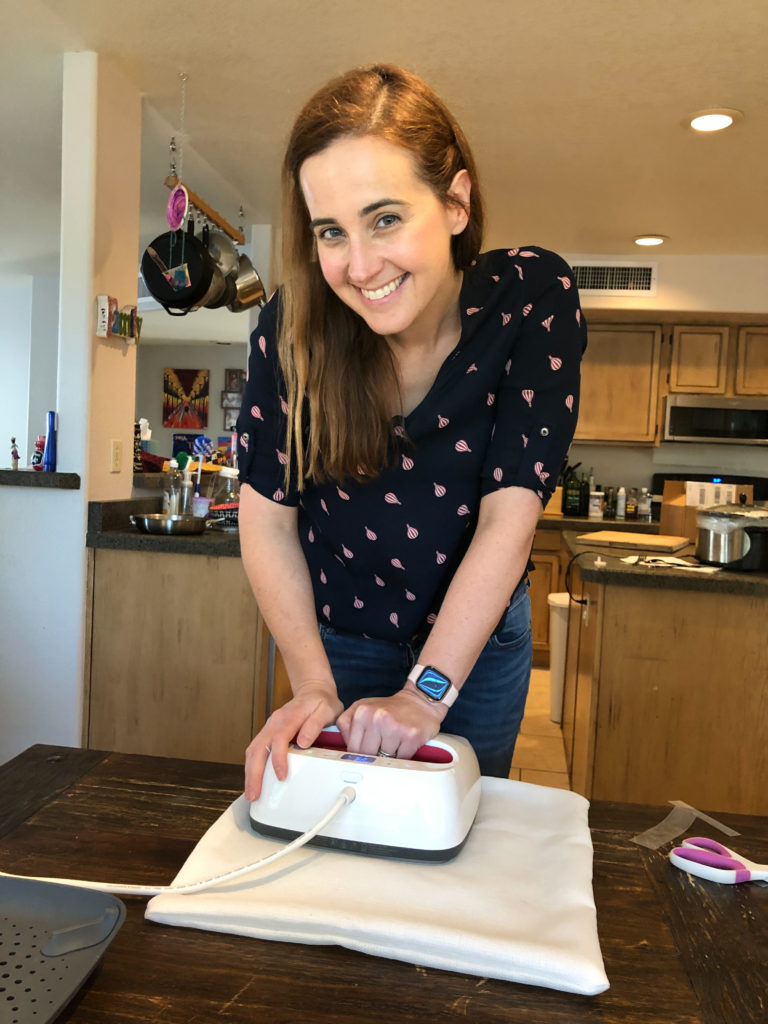
I pressed down for 30 seconds on the front, 15-seconds on the back, and then let the design cool before peeling off the plastic.
Step 4: Finishing the pillow
Once you’re done, stuff your pillow and seal that 5″ hole shut with an invisible stitch.
Again, this was the first time I ever sewed and I was able to do this. You can follow this tutorial for help.
You can do this!
Your stitches don’t need to be pretty. They just need to hold the pillow shut
Now, my lovely porch has some much needed design. It’s a start, right?
These pillows were so fun to create that now I think everyone is getting a pillow for gifts.
A pillow with a hummingbird for my mom.
Personalized pillows for my kids’ beds.
All the ideas!!
If you want some more, go check out the Cricut blog for weekly home renovation project inspiration and tutorials.
Recommended Posts


JoAnn Crohn
CEO/Founder at No Guilt Mom
- The Complete Guide to Getting Your First Passport (Perfect for Moms Ready for A Vacation – By Themselves!)
- The Ultimate Guide On How to Be a Happy Mom
- Recap of the 2024 No Guilt Mom Retreat
- Could this be why you’re so frustrated as a mom?
- How to Stop Yelling at Your Kids When Angry
- How to get family to help around the house (when they’ve been doing nothing)
- Breastfeeding at Night: 9 Coping Skills for Moms with Newborns
- 5 Awesome Holiday Party Games for Kids
- Don’t Make This Mistake When Potty Training Your Child
- I Don’t Know My Neighbors: 3 Ways to Introduce Yourself
- To Circumcise or Not?
- Locked Out of the House with the Baby Inside


One Comment
Comments are closed.